Installing an exhaust fan in your bathroom is the solution that you need for those spaces that never seem to get dry. And if you can remove bathroom moisture and odors, then it would help to make a far more pleasant bathroom experience for everyone.
According to the report of MarketWatch, the global Bathroom Exhaust Fan market size was valued at USD 5162.17 million in 2021 and is expected to reach USD 6672.51 million by 2027. And if your old exhaust fan is not working properly, then you would need to replace it.
However, for that, you need to know how to install and replace bathroom exhaust fan. And many people think that replacing a bathroom exhaust fan is a difficult task, but it is actually a lot simpler than most people would imagine if you have the right tools available.
In this article, we have shared a step-by-step process on how to install and replace bathroom exhaust fan. Also, here we have covered the tools and materials that would be required for this process.
So, let’s get started.
Table of Contents
What You Will Need To Install And Replace Bathroom Exhaust Fan
When you are working on any kind of home wiring or electrical configuration, the most important step is to first disconnect the power at the breaker box. You should also wear gloves, goggles, and respirators while working in dusty conditions.
Before you start to install or replace your bathroom exhaust fan, you should get your tools and materials together. Here is the list of tools and materials required:
- Goggles
- Screwdriver
- Oscillating saw
- Hand gloves
- A utility knife
- Flexible caulk
- Circuit tester
- Putty knife
- Wire connectors
How To Install And Replace Bathroom Exhaust Fan: Follow These 7 Steps
The installation process of different types of exhaust fans follows almost the same basic steps. Here, our guide will show you how to install and replace bathroom exhaust fan in 7 easy and simple steps.
1. Determine Which Type Of Exhaust Fan To Purchase
Before you remove your old bathroom exhaust fan, you should note any markings and also measure its exterior profile. Because these things might be useful to determine which type of exhaust fan you need to purchase as a replacement.
And fans are generally available in the market in different sizes and capacities based on the square footage of the room they service.
However, if you need to replace an existing exhaust fan, the easiest option is to replace the older fan with one of equal size.
When you want to install new exhaust fans in rooms with a standard 9-foot ceiling height, first you need to calculate the square footage of your bathroom to determine which type of exhaust fan you will need.
Generally, small fans are best for smaller bathrooms with up to 70 square feet of space. Medium fans can accommodate between 70 and 100 square feet of space and large fans are perfect for those applications where more than 100 square feet of space need ventilation.
2. Removing The Old Exhaust Fan
First, you need to turn off the electricity to the house at the breaker box. Now, as the fan is still running, you should flip the breaker switches until the fan completely stops.
Also, we would strongly recommend you to leave a note on the electrical panel so that no one else turns the power on while you are doing the replacement work.
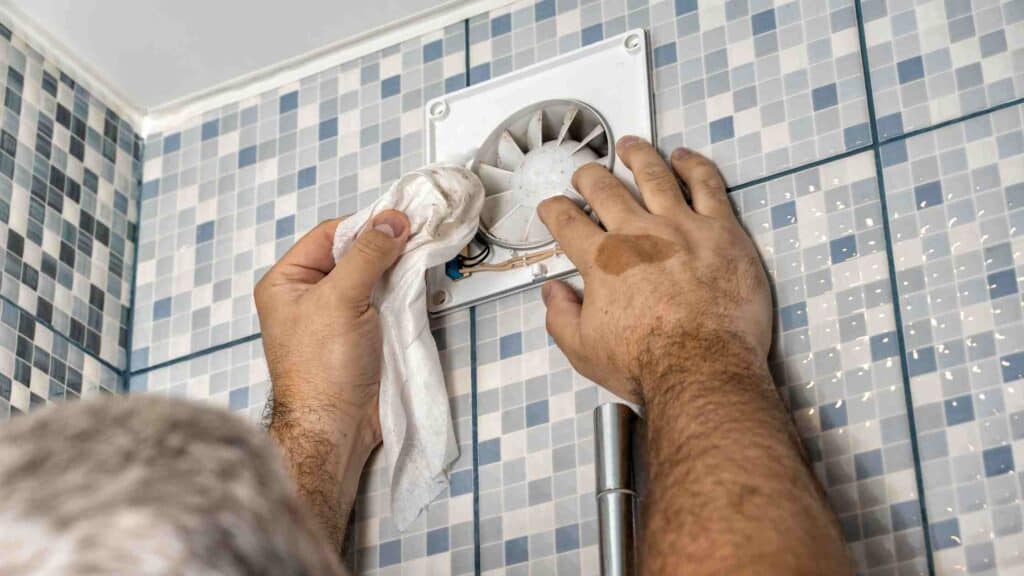
And you should wear goggles to avoid debris in the eyes. Then just use a screwdriver to remove the grill from the old exhaust fan motor.
After that, using a circuit tester you should verify that there is no electricity currently flowing to the exhaust fan. Now, if you can find a plastic electrical connector or plug, simply disconnect the fan’s wires.
Then, you should use a screwdriver to remove the screws that are holding the old exhaust fan in place. In this step, you can also take some special care to support the fan to make sure that it doesn’t fall or break free from the remaining screws.
When you are able to lower the exhaust fan assembly, then you should have access to any ducting attachments that might be holding it in place. Finally, you can set the old exhaust fan assembly aside.
3. Create An Opening Of Appropriate Size For Your New Exhaust Fan
If you are not replacing your old exhaust fan with the same model or an upgraded model that uses the same housing and bracketry, then you would need to remove the old exhaust fan housing using a screwdriver.
You should remove any hardware that is holding the old housing in place and also the housing itself. Now, you can hold your new exhaust fan assembly over the hole left by the old fan.
Then, you need to mark around its perimeter to establish the size and shape of the hole that you would need to cut in the ceiling drywall for your new fan.
After that, use an oscillating saw and proper protective equipment for your eyes and hands to cut along the traced line to create an opening of appropriate size for your new fan.
Also, it is really important to make sure that you would not hit plumbing or electrical lines on the other side of the drywall.
However, if you are installing the exhaust fan system for the first time in your bathroom, then you might also need to cut away material through the attic or crawl space above the bathroom in which you are working.
Because you need to accommodate the fan motor assembly and ducting directly above the ceiling hole in your bathroom.
4. Install Your New Exhaust Fan Housing
Now, you can place your new exhaust fan housing over and inside the newly cut hole. Then, verify that all lengths and angles of the hole are appropriate or not.
If these are correct, then you should proceed with the installation process of the housing by following the manufacturer’s installation instructions.
Any screws that would be used to secure the housing will need their holes pre-drilled and you should use the housing brackets as a template for the holes.
After completing the pre-drilling and installing the new fan housing properly, you need to check to make sure that all housing pieces are secure and capable of bearing the weight of the fan.
And if you are installing the exhaust fan system for the first time, then mounting to a joist and also potentially some blocking between joists will definitely be needed to support the weight of the exhaust fan and ducting.
Because you should not depend on sheetrock alone to support the weight of any object that is not designed for such a configuration.
Finally, you need to lift the fan motor assembly into place and then secure it to the housing brackets by using the manufacturer-supplied hardware.
5. Connecting Wires For Your New Exhaust Fan
If your new exhaust fan is equipped with a plastic electrical connector or plug, then you can connect it to the corresponding electrical connection point.
However, if the exhaust fan does not have a plastic electrical connector or plug, or if it does not fit the pre-existing wiring properly, then you would need to splice the wires together. And for this process, turning the power off is mandatory.
You can begin by clamping the electrical cable to the exhaust fan housing with 6 to 8 inches of wire extending into the box.
After that, you should strip almost a half inch of insulation from the end of each wire and, then connect the wires by using twist-on electrical connectors. Now, you need to connect the bare copper wire with a ground screw to the plate at the electrical splice box.
Also, you should make sure to staple the cable to a joist or vertical framing member within 12 inches of the cable clamp.
However, if you don’t have too much confidence in general wiring principles or you could not understand any part of this step, then you can definitely contact a licensed electrician for this process.
And if you want to meet all the safety requirements, then all of your electrical work should be reviewed by an electrical inspector.
6. Check Ducting Is Properly Connected To The New Exhaust Fan
Any modifications to the existing ducting should not be required for a simple installation and replacement process.
But, if ducting is damaged or not properly connected to the new exhaust fan, then you should resolve those issues.
Also, if you are installing an exhaust fan system for the first time, then you will need to determine and clear a path for ducting to the exterior of the house. It is one of the most important steps in this whole installation process.
You need to attach an aluminum elbow to the fan’s exhaust port, and then try to run as direct a route as possible to the exterior vent by using as few turns as possible. Also, any vents should be properly sealed and covered at the building’s exterior.
7. Seal The Area Around The Fan Assembly
Now you need to seal the area around the fan assembly by using flexible caulk to make sure there are no air gaps at the ventilation point and also to minimize the sound and deteriorating effects of vibration when the exhaust fan is running.
And in the attic or crawl space, you can replace any displaced insulation and cover your new exhaust fan’s housing. After that, in your bathroom, you should first restore power and test the fan.
If the fan is making a loud noise, then disconnect the power again and make sure that the fan is seated flat and all mounting is securely fastened. Because most vibrational noise is generally caused by incorrect fastening or seating of the fan assembly.
However, if the fan runs quietly or properly, then you can proceed to complete your job. Next, you need to Install the mounting springs and the decorative cover or grill of the new exhaust fan.
Finally, you can use your putty knife to patch any marks made during the installation or replacement process.
When You Need To Replace A Bathroom Exhaust Fan
When an exhaust fan could not clear steam from your bathroom during a bath or shower or it starts to make noises, then generally the most appropriate and economical solution is to replace the exhaust fan unit.
Because newer models are usually quieter and more efficient than those they replace. Also, bathroom fans are not complicated.
Only a small electric motor turns a fan and the blades push the air through a duct to the outside of a room or house to remove steam and smells.
And most modern exhaust fan systems are generally contained in a modular unit – a box where the electronics and mechanical bits are all set in place. Because of that, the replacement process has become a lot simpler.
Wrap Up On How To Install And Replace Bathroom Exhaust Fan
A bathroom exhaust fan can send humidity and contaminants from your bathroom outside to give you better air quality and also help you to reduce mold and mildew growth.
And if you are installing a new exhaust fan or replacing an old bathroom fan, the process is quite simple.
However, you might find several problems in this whole process, that can be handled by a professional contractor in the best way.
If you are not certain about any of the wiring steps in this process, then you should take the help of a licensed electrician, because fire danger exists with incorrect wiring.
We hope that our helpful guide has answered your all queries about how to install and replace bathroom exhaust fan.
If you have any questions in your mind regarding the installation process, then please let us know in the comments below.
FAQ: How To Install And Replace Bathroom Exhaust Fan
As a lot of people don’t know how they can replace their bathroom exhaust fans, they have lots of questions regarding this topic. Here we have picked a few of them and answered them briefly in the FAQ section.
Q1. Can You Just Replace A Bathroom Exhaust Fan Cover?
Ans: Yes you definitely can, and replacing your bathroom exhaust fan grille or cover or replacing your entire exhaust fan is actually one of the easiest DIY projects for your bathroom ventilation.
Q2. How Often Should You Replace A Bathroom Exhaust Fan?
Ans: Bathroom exhaust fans generally have a lifespan of around 10 years, if they receive proper care and maintenance. And if you think you have a fan that is nearing the end of its functional life, then you should think about replacement.
Q3. How Much Does It Cost To Install A Bathroom Fan?
Ans: If you want to install a bathroom exhaust fan to remove odors from bathrooms, then the price can vary between $240 and $548, with an average cost of approximately $382. This cost mainly depends on several factors such as labor costs, geographic location, and bathroom size.