Building a soundproof garden room can be a very rewarding project. You’ll have a quiet space to retreat to, away from the hustle and bustle of everyday life. But it isn’t always easy to do. So how you can do that?
According to the report of Noise Pollution Clearinghouse, the noise levels in some cities can exceed 120 decibels. This is enough to damage hearing and cause other health problems. In fact, this is very dangerous for our ears.
In order to reduce external noise from neighbors, traffic, etc., you need to think about building a soundproof garden room. That’s why you need to read this complete article. Because in this article I have covered 9 simple steps to build a soundproof garden room.
Also, I have shared some tips to make your garden room soundproof for focusing on the work. This is going to be very interesting so don’t skip any point.
Let’s Start!.
Table of Contents
What is Soundproof Garden Room & Why Should You Have One
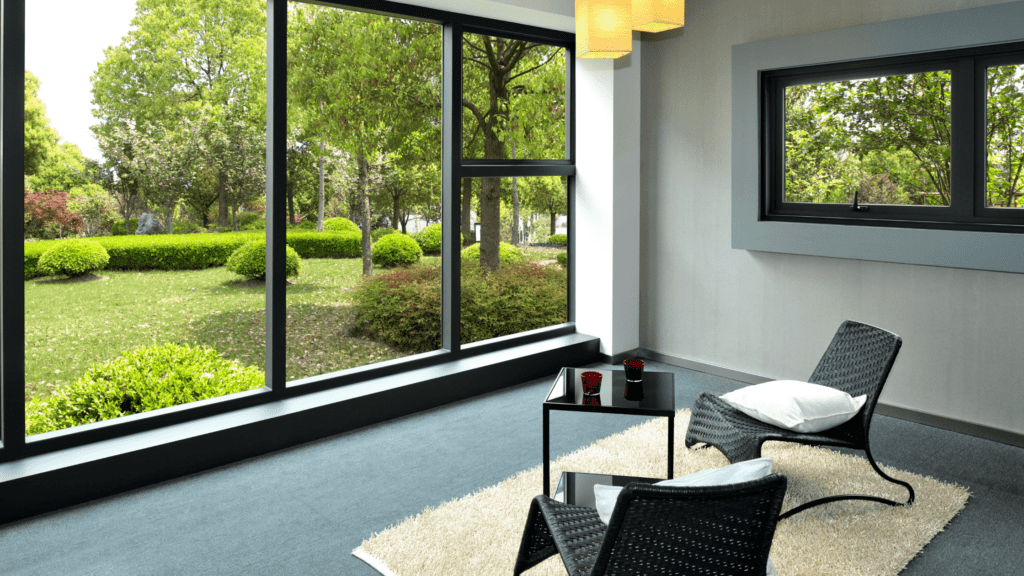
A soundproof garden room is a small, dedicated workspace that is designed to keep outside noise from bleeding into the room. It’s a good project for any homeowner who wants their own private space to go when they need some quiet time.
If you have a backyard studio or office retreat at your house, you might be getting frustrated with the noise level. I know you don’t want to hear your neighbors, children playing outside, or animals making noise.
So what do you think about building a soundproof garden room to stay away from unnecessary noises? Yes, that’s right! You can also build one in your backyard to enjoy some peace and quiet whenever you need it.
Imagine a place where you can get rid of noise and distractions so that you can focus on some work without any disturbance. Well, it’s not a dream! If you have a garden room in your backyard then you can get that quiet space to stay away from noises.
Tips To Use Your Garden Room As Home Office Or Studio
To be honest, it is not an easy task to make an outdoor room soundproof. But if you follow some tips, then you can make your garden room soundproof pretty easily. Here are some tips to make your garden room soundproof:
- Don’t Try To Make The Room Completely Soundproof As It’s Impossible To Make A Outdoor Garden Totally Noisy-Free.
- You Need To Focus On Layers Of Sound Reduction So That Your Garden Room Can Do Its Job.
- You Shouldn’t Install Flooring Materials That Are Noisy, Such As Stone Or Tile Floors.
- Avoid Overcrowding The Room With Items That Might Create Sound, Like Tables And Cabinets.
- Use Curtains To Keep Out Unwanted Light And Noise From Outside
- Put Your Speaker In A Difficult Place That Will Be Hard For People To Listen From Outside.
- Avoid Using Cement/Concrete In The Flooring Of Your Garden Room As It’s Very Noisy If You Walk On It.
- Use Acoustic Panels And Other Absorption Materials To Reduce Noise Inside The Room.
How To Build A Soundproof Garden Room: Step By Step Process
You know how you can use your garden room as a studio or office room. But how you can build it? So here is the step-by-step process.
Step 1st: Choose The Right Spot
Choose a good spot for your garden room that would be away from main traffic and noise. You should go for a shady spot. It will be better if you place your garden room near the wall to get rid of noise from both sides.
Also, select a location that’s quiet and has easy access to nearby power sources. And keep in mind that you need space around the room to work comfortably inside.
Step 2nd: Calculate The Size Of Your Room.
To build a soundproof garden room, you need to know how much space you need to fit all your stuff. So I suggest you take a tape measure and start measuring the inside of the room.
Then take all of your stuff into account, like tables, chairs, bookshelves, and anything else you plan to put inside. This will help you figure out how much room you have to work with.
Step 3rd: Dig Out The Foundation
Now you need to dig out the foundation for your room. The ground beneath the spot should slope slightly because it’s easier and cheaper than bringing in a separate foundation. First, determine where your footings will go, and then start digging with a shovel until the footing is level with the surrounding soil.
Use bricks, cinderblocks, or wood scraps to build a small, level foundation for your garden room. For the flooring, you need to use concrete slabs if they are not more than 6 inches thick. Otherwise, you can lay down wooden boards instead of using concrete slabs.
Once your foundation is in place, smooth out the dirt you dug up so that there are no bumps or ridges. This will help provide a good surface for your flooring materials to rest on.
Step 4th: Build The Floor Frame
You need to build the floor frame with 2x4s and plywood sheets. Cut four pieces of 2x4s the same length to use as your sidewalls. And then cut four more pieces that are 5 inches longer than your sidewalls because you need to overhang them by 5 inches on all sides.
Assemble the floor frame with screws, making sure everything is level before inserting the plywood sheet. You need to place the sheet of plywood on top and then screw it into place.
Finally, you need to make sure your floor is square by measuring between opposite corners. Adjust as needed until everything measures the same. This will help keep your garden room square and level as you go along with building it.
Step 5th: Install The Wall Frame
You need to install the wall frame. Start by assembling four 2x4s in a square, with each one measuring 5 feet long by 4 inches deep. The space in between your wall studs should be 16 inches on center for standard drywall or 24 inches on center for double 2×4 walls.
Then you need to cut two more studs 5 feet long by 3 inches deep for the top and bottom plates. The two center wall studs also need to be 3 inches deep, but only one of them will be 5 feet long.
Make sure all of your studs are level before screwing them into place with 8-inch screws that are driven through the outer edge of the wall studs and into your floor joists. If you’re building a double-wall, screw in one of the center studs to the top plate first, then add both end studs when you attach it to the bottom plate.
Step 6th: Install The Door Frame And Add The Drywall
Now you need to install the door frame with 2x4s and plywood. You may need to cut the plywood into smaller pieces if it doesn’t fit snugly over the top and bottom plates of your wall studs.
Then, screw through your 2x4s and into the edge of your drywall with 1-inch screws to help hold it in place while you secure it.
Finally, cut the drywall to fit the opening of your door frame and screw it into place with 1-inch screws to help hold everything in place as you finish building the room.
Step 7th: Install The Door And Frame It With Plywood
For your door, I suggest using 3/4 inch plywood. Start by measuring the width of your door frame along each side, and then cut out a piece of plywood 5 inches wider on each side so you have some room to screw it into place.
Nail or screw through the center of the plywood and into your 2x4s with 1-inch nails or screws spaced 12 inches apart. Then, add a 3-inch piece of lumber along the top and bottom of your plywood door frame to provide extra stability when you open and close it later on.
After that, measure for the hole in your drywall where your doorknob will be going. Don’t forget to allow space for the jamb if you want a finished edge. Then, cut out the hole with a jigsaw and test it out by placing your doorknob in place to make sure you have enough room around it when it’s closed properly.
Finally, add screws along the inside of your door frame to hold everything in place while you complete building the rest of your garden room. And then install door hinges with screws driven through the door itself and into your wall studs.
Step 8th: Build The Roof Support Frame And Add Plywood
You need to build a roof support frame before you can install your plywood roof. Cut two pieces of 2×4 that are 6 feet long for the end studs, and then cut a piece of plywood that’s 2 feet wide and 6 feet long. You’ll also need a shorter piece of plywood that’s 8 inches wide by 4 feet long.
Attach the end studs to your longer piece of plywood with straight panels on each side before attaching them to your top plate at either end. Then, add the center studs to the frame and screw in a piece of plywood.
If you’re building a double-wall, attach your shorter piece of plywood on top before going any further. Finally, add a 2×2 along the bottom for a leg and then add a 2×4 across the middle to help support everything in place while you create a flat roof.
Step 9th: Paint The Wall With Soundproof Paint.
The next step is to paint your wall with soundproof paint. This is an optional step but it will help reduce the noise in your garden room, especially if you’re planning on watching TV or listening to music at a high volume once everything’s finished.
Before you can paint anything, however, you need to scrape off any loose pieces of paint on the wall. Also, clean it with TSP to help seal the wall and then tape off the flooring to prevent it from getting paint everywhere. After that, apply a coat of soundproof paint and let it dry overnight.
Then, apply a second coat and wait for everything to dry before you move in! But don’t worry if your room isn’t finished right away. Your structure is sound and it can stand on its own, but you’ll want to wait until everything’s dry before adding any soundproofing materials.
Step 10th: Add Soundproofing Materials Inside The Garden Room
Now it’s time to add soundproofing materials inside the garden room. Not only will this help muffle noise, but it’ll also protect your wall from the elements outside too. The first step is to screw in your rubber membrane between studs along the top and bottom of your interior wall.
Then, create a drywall/membrane sandwich to help absorb noise along the inside of your wall. Start by adding drywall to the studs, followed by a rubber membrane, and then another layer of drywall. This method will definitely make installing soundproofing materials easier for you!
Once that’s done, install rigid insulation along the outside of your garden room walls with a couple of screws. Then, install a rubber membrane on top of that insulation to keep everything in place and help prevent damage from the wind and rain.
Finally, add some soundproof panels along the inside of your wall to help block up any sound leaks. These can be installed either vertically or horizontally, depending on how you want them to look (vertical is easier though).
Wrap Up On How To Build A Soundproof Garden Room
Have you been thinking about building your own garden room? If so, this article is for you. In it, I outline 9 simple steps to follow in order to build a soundproof garden room.
Additionally, I share some tips on how to make your garden room even more soundproof, so that you can focus on the task at hand without being disturbed by external noise.
Follow these simple tips and you’ll be well on your way to having your very own quiet space in which to relax and rejuvenate. Let me know in the comments below if you have any questions or if you decide to build your own garden room!
FAQ: Step By Step Process To Build A Soundproof Garden Room
Building a soundproof garden room is no easy task. However, it is completely manageable if you know what to do. The following are the top 3 most frequently asked questions. Read!!.
Q1. What is the cost of building a soundproof garden room?
Ans: The cost of building a soundproof garden room depends on several factors such as the number of soundproofing materials you use. On average, however, you can expect your garden room to cost anywhere from $500 – $1,000 per 12′ x16′ area.
Q2. How long does it take to build a soundproof garden room?
Ans: The time it takes to build a soundproof garden room depends on its size. On average, however, you can expect your project to take anywhere from 1 – 2 weeks.
Q3. Can I put furniture in my garden room?
Ans: Of course! Make sure to soundproof your flooring if you want an acoustically private space. Also, try to avoid putting anything against the wall. This reduces noise transfer between outside and inside.