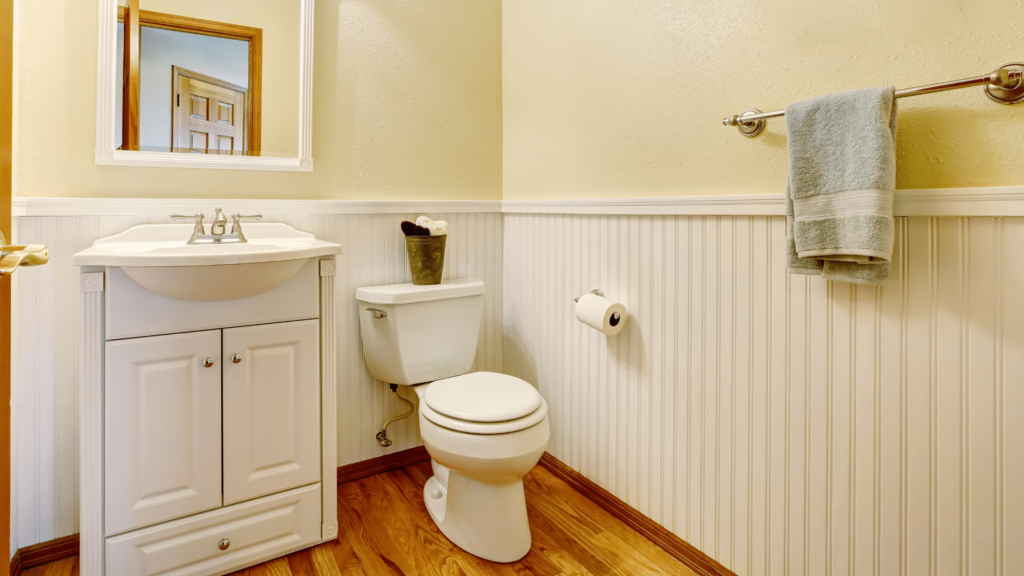
Flooring is one of the most important aspects of any bathroom remodel. Not only does it play a large role in the overall aesthetic of the space. But it can also help to protect your floors from water damage and make them easier to clean. Hardwood flooring in bathroom can be a choice for you.
According to the report of the National Wood Flooring Association (NWFA), a national trade organization for the wood flooring industry, in 2016 about 64 percent of homeowners choose wood floors for their homes.
That figure is likely to have increased in recent years as more and more homeowners have come to appreciate the many benefits that wood floors have to offer.
However, many people are still hesitant to install hardwood in their bathrooms. Because they think it will be difficult to keep the floors clean and free of water damage.
But, with a little bit of care and maintenance, hardwood floors in a bathroom can be a beautiful and practical addition to your home.
So in this article, I am going to share a step-by-step process to install hardwood flooring in a bathroom. Also, I will explain some benefits that you will get from hardwood flooring.
Let’s Get Started!
Table of Contents
Benefits To Install Hardwood Flooring In Bathroom
Wood flooring is an excellent choice for bathrooms and other wet areas. Because it provides a number of benefits:
- Water-Resistant: Hardwood floors are water-resistant and can handle spills and splashes without warping or buckling.
- Easy To Clean: They are easy to clean and maintain. Simply sweep or vacuum on a regular basis to remove dirt and dust. And mop with a mild soap and water solution when necessary.
- Non-Slip Surface: Hardwood floors have a natural non-slip surface. That makes them a safe choice for bathrooms.
- Aesthetically Pleasing: They will add beauty and value to your home. Also, they come in a variety of colors and styles to match any décor.
- Longevity: With proper care, hardwood floors will last for many years.
Step By Step Process To Do Hardwood Flooring In Bathroom
Now that you know the benefits of hardwood flooring in a bathroom. It’s time to learn how to install it. Follow these simple steps and you’ll have beautiful hardwood floors in no time.
Tools That Required
These are some tools that you will need to install hardwood floors in your bathroom.
- Tape measure
- Pencil
- Circular saw
- Carpenter’s level
- Drill
- Stapler
- Tapping block
- Hammer
- Pry bar
- Circular saw blade for cutting laminate
- Putty knife
- Hardwood flooring
- Underlayment
1. Measure The Area
Measurement is the action of quantifying or estimating the size of something. In this case, you’ll need to measure the dimensions of your bathroom. This will give you a good idea of how much hardwood flooring you’ll need to purchase. Start by measuring the length and width of the bathroom.
Then, measure the size of any alcoves or other areas that need to be covered. Also, take into account any fixtures that will need to be removed before installation can begin. Because you can’t install hardwood flooring under a toilet, you’ll need to factor in the cost of a new one.
2. Choose The Way You Want To Install Hardwood Flooring
Installing hardwood floors in a bathroom is a big project. There are three ways that you can go about it. The first option is glue-down installation. This is the most common way to install hardwood floors. It’s also the easiest and most affordable option.
The second option is a nail-down installation which I have explained in this article. This is a more easy option than above, but it’s worth it if you want your floors to last longer. Because nails create a more secure connection, this option is ideal for high-traffic areas.
The third option is a click-lock installation. It is one of the popular ways to install hardwood flooring. It’s also the easiest and most affordable option. However, you will need to have a level surface. If your bathroom is not level, then this option is not for you.
3. Choose The Right Hardwood Flooring
Now that you know the square footage of your bathroom, it’s time to choose the right hardwood flooring. There are many different types of hardwood floors to choose from. The three most popular types are engineered hardwood, solid hardwood, and bamboo.
Engineered hardwood is made from multiple layers of wood that are glued together. This makes it more resistant to moisture and temperature changes. Solid hardwood is just one piece of wood. It’s the most popular type of hardwood flooring because it’s easy to install and very durable.
Bamboo is a type of grass that’s been made into flooring. It’s very strong and resists moisture well. You can choose any type of hardwood flooring that you like. Just make sure that it’s compatible with the subfloor in your bathroom.
4. Prep The Area
Once you’ve chosen the way you want to install hardwood flooring, it’s time to prep the area. This includes removing all fixtures, such as toilets and sinks. Then mark the area where the hardwood flooring will be installed with a pencil.
Because you’re working with a small space, it’s important to be as accurate as possible. Once the area is marked, use a saw to cut along the lines. However, be careful not to cut too deep. You don’t want to damage the subfloor. Also, make sure to wear safety glasses to protect your eyes.
5. Remove The Old Flooring
Once you’ve chosen the right hardwood flooring, it’s time to remove the old flooring. This is a necessary step because you need to have a smooth, level surface to work with. So first, remove any fixtures that are in the way.
Then, use a pry bar to remove the baseboards. Be careful not to damage the wall. Next, remove any nails or staples that are holding the old flooring in place.
Finally, pull up the old flooring. If it’s glued down, you may need to use a heat gun to loosen the adhesive. At last, you should have a smooth, level surface to work with.
6. Install The Underlayment
Underlayment is a layer of material that goes underneath your hardwood flooring. It helps to protect the subfloor and ensures a smooth surface for your hardwood floors.
There are a few different types of underlayment available, so make sure to choose one that’s compatible with your hardwood flooring. Once you have the underlayment, unroll it and lay it down in the area where the hardwood flooring will be installed on the bathroom surface. Then use a utility knife to cut it to size.
Make sure the underlayment is level before moving on to the next step. Because hardwood floors are sensitive to moisture, it’s important that the underlayment is laid down correctly.
7. Install The Hardwood Flooring
Now it’s time to install the hardwood flooring. Start by laying down a vapor barrier. This will protect the floors from moisture. Then, lay down the first row of hardwood planks. Be sure to use a level to make sure the planks are level.
Once the first row is in place, continue installing the hardwood planks until the floor is complete. Make sure to leave enough space around the edges for expansion.
Because hardwood flooring expands and contracts with changes in temperature and humidity, it’s important to leave enough space around the edges.
8. Install The Baseboards
Baseboards are trim pieces that are installed along the base of the wall. It helps protect the wall from damage and covers any gaps between the floor and the wall. Installing baseboards is a fairly easy process.
So when the hardwood floor is installed now you need to install the baseboards. To do this, first, measure the length of the wall and cut the baseboard to size. Then, nail the baseboard into place using finishing nails.
Be sure to use a nail set so that the nails are flush with the surface of the baseboard. Finally, caulk the gaps between the baseboard and the wall. But if you have baseboard installed to the old hardwood flooring. Then first you need to remove it.
9. Finishing Up
Once the baseboards are in place, your hardwood floors are installed! But there are a few more steps you need to take to finish the job. First, fill any gaps or cracks with wood filler. Then, sand the surface of the floor until it’s smooth.
However, you don’t need to sand the whole floor. Just focus on the areas where there are gaps or cracks. After that, vacuum up the dust and then clean the floor with a damp mop. Once the floor is dry, apply a coat of finish.
This will help to protect the floors and make them look shiny and new. There you have it! Now you know how to install hardwood floors in a bathroom. With these tips, you can install hardwood floors in any room in your home.
How To Save Bathroom Hardwood Flooring From Potential Damages
Water is one of the worst enemies of hardwood floors. Water can cause the wood to swell and warp, and it can also lead to the growth of mold and mildew.
But here are some important things. That you can use in your bathroom hardwood flooring. This will help you to protect the flooring.
- Always use a mat: You should always use a mat near the sink and bathtub in your bathroom. This will help to absorb the water and will also keep the floor dry.
- Wipe up the spills: You should always wipe up the spills as soon as possible. Water can cause damage to the floor and can also lead to the growth of mold and mildew.
- Use a humidifier: A humidifier can help to keep the air in your bathroom moist. This will help to prevent the wood from drying out and cracking.
- Use a fan: A fan can help to circulate the air in your bathroom. This will help to prevent the growth of mold and mildew.
- Keep the bathroom clean: You should always keep the bathroom clean. Mold and mildew can grow in damp and dirty environments.
- Repair the leaks: If there are any leaks in your bathroom, you should repair them as soon as possible. Water can cause damage to the floor and can also lead to the growth of mold and mildew.
- Install a drain cover: A drain cover can help to prevent water from flowing onto the floor. This will help to keep the floor dry and will also help to prevent the growth of mold and mildew.
- Use a dehumidifier: A dehumidifier can help to remove the moisture from the air in your bathroom. This will help to prevent the growth of mold and mildew.
Wrap Up On How To Do Hardwood Flooring In A Bathroom
Hardwood flooring is a beautiful addition to any room, and installing it in your bathroom can be a great way to improve the look and feel of the space.
If you’re thinking about adding hardwood flooring to your bathroom, follow these simple steps to make sure the installation goes smoothly.
And if you do run into any problems during the process, we’ve got some tips for how to save your hardwood flooring from potential damages. However, take some preventive steps.
You can keep your bathroom hardwood flooring in good condition for a long time. But in case there is any damage to the flooring. Then you should contact a professional for repairs. So what are you waiting for? Start planning your bathroom renovation today!
FAQ: Is It Good To Have Hardwood Flooring In Bathroom
Hardwood flooring in the bathroom can be a great addition to your home. But you should know the potential questions. That may come to your mind while working on it.
Q1. Should I install hardwood flooring under the toilet flange?
Ans: You should always install a wax ring under the toilet flange. This will help to create a seal and will also prevent water from seeping through.
Q2. Can I install hardwood flooring over a radiant heated floor?
Ans: You can install hardwood flooring over a radiant heated floor. But you should check with the manufacturer first to make sure that their product is compatible with your flooring.
Q3. Can I install hardwood flooring in a bathroom that doesn’t have a window?
Ans: You can install hardwood flooring in a bathroom that doesn’t have a window. But you should take some precautions to make sure that the room is properly ventilated. Or if you have any kind of ventilation then it works best.