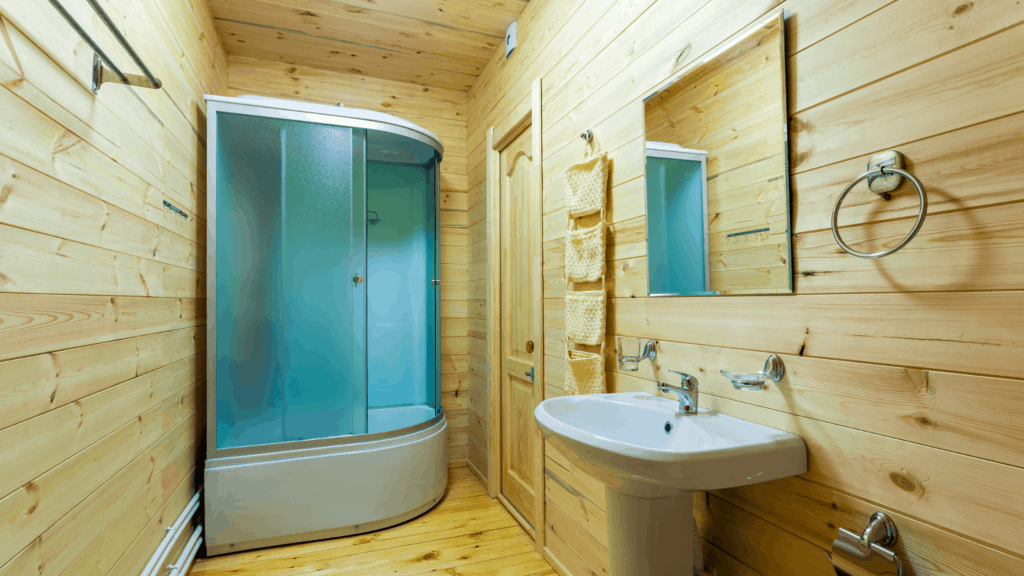
Learning the installation procedure for vinyl plank flooring in the bathroom will help you to do this by yourself.
So that you can save some money that you are going to spend on professional installation.
According to the report of the U.S. Bureau Of Labor Statistics, more than 65% of people in the US only call a professional when they have any problem to fix in their house.
However, these works are not so hard but they will.
I know a huge number want to go with an easy way but only if they have the budget for it.
Otherwise, they come in the 45 percent of people who usually do small fixing in their house by themselves.
I know the professional installation works much better than yours. But this will also increase your budget up to 20 percent.
But if you have some skills and knowledge to use basic tools in your house. Then I am pretty sure you are also capable of doing this without any professional help.
So if you are also interested in installing vinyl plank flooring in your bathroom by yourself.
Then you should read this article because I have shared a step-by-step guide of how you can do that. That will lead you to complete this work properly.
Also, I have covered what things you will face after installing the vinyl plank flooring in your bathroom. So let’s understand this first.
Table of Contents
Vinyl Plank Flooring In Bathroom Pros And Cons
Having vinyl plank flooring in the bathroom is a great choice. Because it has many benefits and some disadvantages. But what are those? That’s why you need to read below.
Pros
- Water Proof: Most vinyl plank floorings are waterproof. That can easily hold a high level of water without damaging the floor surface.
- Scratch Proof: If you have any pet that usually scratches the floor. Then you should try vinyl plank flooring because its surface is scratch-proof.
- Durable: If you don’t want to invest in your bathroom floor again and again. Then vinyl plank flooring is a great choice because it will last about 5 to 25 years.
Cons
- This is not environmentally-friendly flooring because it is a plastic compound.
Installing Vinyl Plank Flooring In Bathroom: Step By Step Guide
In the past, have you ever installed any flooring in your house? If not, then this will become hard for you.
That’s why you should strictly follow these steps to make things better.
1. Choose The Type Of Vinyl Plank Flooring
Which vinyl plank flooring you have selected to install in your bathroom? Before starting the installation procedure of vinyl plank flooring in your bathroom.
You should know which type of vinyl flooring you are using. Is it great to use in your bathroom or not?
As you know most types of vinyl plank flooring are waterproof but some are not.
Maybe the one that you are using is not waterproof and you just wasted your money. So there are three main categories of vinyl plank flooring.
The first one is called luxury vinyl planks (LVP), the second one is wood plastic composite vinyl plank flooring (WPC).
The last one is called stone plastic composite vinyl plank flooring (SPC). But the question is which category is better to install in the bathroom?
So LVP and WPC these two categories of vinyl planks are great and you can easily install them in your bathroom. Because both are waterproof and durable.
2. Remove Toilet & Existing Flooring
As you know this is impossible to work on existing flooring and installed toilets. That’s why after selecting the type of vinyl plank flooring you need to remove both of them.
But you should be very careful while removing the toilet. Because if it may damage then you need to invest in it also.
Don’t worry, for removing the existing flooring you only need the combination of pry bars and a large demo bar.
Just hold these tools tightly and you are able to pry up the ceramic tiles or the other underlayment that you installed.
When you are near the toilet flange make sure to slow down the process. Otherwise, you may damage the whole water line.
3. Clean The Bathroom Floor Surface
Congratulations if you successfully remove all the things from your bathroom floor. Because it is the hard part of this whole process that may damage other things.
Now you need to clean the bathroom floor properly. So that you can complete your next step.
The cleaning process should be in two phases. In the first phase, you need to use a broom and brush to remove all the dirt and dust from the surface.
Then the time came for the second phase which needed a mixture.
That includes normal detergent, water, and scrub. Then you need to carefully scrub the whole surface.
Make sure not to try to install any vinyl plank in your bathroom until the whole surface dries properly.
4. Check The Level Of Your Bathroom Floor
Do you know where the low spot in your bathroom is? Before removing your old flooring if the water is accumulating in one place.
Then this is the low spot in your bathroom. That should be fixed before installing the new vinyl plank flooring.
Otherwise, it will damage the flooring because it needs some time to dry up if you are using the peel and stick vinyl planks.
If you forgot and don’t know where an exact low spot is in your bathroom. Then you can also use the chalk line by centering the bathroom flooring.
All you need is to mark the chalk line of each and snap a line between them. This simple design will know where a slow spot in your bathroom is.
But if you are still facing a problem then you can also watch this YouTube video.
5. Fill The Low Spot
So after watching the YouTube video and mark down the exact chalk lines. If you know the low spot in your bathroom.
Then this time to fill the space. So that you can level your bathroom floor to prevent accumulating water in one place.
Suppose if you don’t fix this issue and the water level is higher at the low spot.
Then whether the floor is waterproof will also damage the wall that requires more money than this process.
So if you know then all you need is just get the mixture of concrete filler on the surface. Then carefully spread it over the low spot and check the level.
Make sure to wait around one day to let it dry properly. So that you can get a strong surface for your vinyl plank flooring.
6. Add Plywood On Bathroom Floor Surface
Is your house made from wood and the bathroom surface is not quite hard? Then directly installing the vinyl plank flooring on it can be risky work.
Because as you know the vinyl planks have harmful chemicals that may damage the base of your bathroom.
That’s why you need to use plywood as the middle layer on your bathroom floor surface.
It will protect the base of your bathroom floor surface and prevent the direct connection between them.
All you need is just some nails and pieces of plywood. You need to cover the complete floor surface of your bathroom.
If you want to protect your house from the harmful chemicals of vinyl plank flooring.
7. Fill Silicone Caulk Along with Bathtub
As you know, the bathtub is the heaviest thing in your bathroom. Also, it has some empty space under the bathroom.
That’s why water accumulates under the bathtub. Then whether your house is made from wood or concrete it will damage very soon.
Also, installing the vinyl plank flooring under the bathtub is impossible. When you go inside the bathtub then all of the vinyl planks will break.
That’s why you need to fill the silicone caulk along with the bathtub after every stage for installing the vinyl plank flooring in your bathroom.
The first one starts after removing existing flooring, the second stage after installing the plywood. Then at last on the vinyl plank flooring.
This will ensure a 100 percent waterproof surface and prevent any leaks.
8. Planning Your Vinyl Plank Flooring Installation
Planning is the important phase for doing anything. Because this includes what you need to do next, what things are required, and where you need to start.
This will also increase the success rate. So while installing the vinyl plank flooring on your bathroom floor surface.
You also need to build your plan and try to add each and everything that is required for this work. So that you can start collecting it in one place.
Because it is difficult to leave the work incomplete and go find an important thing.
9. Cut The Tongue Of First Row
Do you know the vinyl plank flooring has two sides? The first one is grooved and the second one is called tongue side.
Both sides are used to interlocking other vinyl planks with each other. But in the first row, there is no need to have a tongue side.
That’s why you need to cut down it so that it can easily fit against the wall. Otherwise while installing the baseboard this can easily get out of it.
Don’t worry, the cutting procedure is very simple. All you need is just a utility knife and carefully cut down the tongue side. But this should be used in the last row also.
10. Lay Down the First Row
Now you need to lay down the first row of your vinyl plank flooring. But this is very important because this will decide how strong your structure should be.
If all the attachments are in the straight line then they can lose and come out anytime.
This is not an ideal design for vinyl plank flooring installation. That’s why another attachment between two vinyl planks should not be in a straight line.
That’s why while laying down the first row of vinyl plank flooring in your bathroom.
You need to cut down the last and the first piece of vinyl plank. This will help you to prevent this problem and make the structure stronger and better.
11. Insert The Second Row Of Your Vinyl Plank Flooring
If you successfully install the first row of your vinyl plank flooring against the wall. Now you need to do the same thing with the second row.
But this time you don’t need to cut the tongue side of your vinyl plank flooring.
Also, this time the first and last piece of the vinyl plank should not be cut in half size. You need to install them as they are so that you can break the attachment line.
The first and second rows will guide you to install the remaining rows of vinyl plank flooring in your bathroom. But make sure to properly interlock all the vinyl planks.
12. Adjust The Vinyl Planks With Door Jambs
Have you seen the small space under your bathroom gate frame? Yes, there is and the space is called door jambs.
That can hold the flooring because you can’t install the baseboard on it. If you do that then the door can be closed.
That’s why when your installation of vinyl plank flooring reaches the bathroom gate. You need to be very careful and make sure to add space while cutting.
Otherwise, it will not fit properly and the piece will be wasted. All you need is just to bend the vinyl plank and use the hammer to push it into space.
How To Install Peel And Stick Vinyl Plank Flooring In Bathroom
The hard and peel and stick vinyl planks are different. However, both are vinyl planks but the installation process is a little bit different.
Because the peel and stick are the same described while installing them only you need to remove the back and stick on the bathroom surface.
You don’t need to interlock them all together and don’t require cutting the tongue because these vinyl planks haven’t.
But make sure the surface should be well cleaned otherwise the adhesive will not work better.
Installing the plywood is also necessary because it also requires a smooth surface. But after removing the existing flooring you will not have.
Wrap Up On Step By Step Process To Install Vinyl Plank Flooring In Bathroom
Whether you have peel and stick or interlocking vinyl planks. While installing both of them are required to follow the steps.
So that you can get the best result. Suppose, before removing the existing floor if you are trying to find the low spot.
Then it will not be going to work. That’s why I listed about 12 ways to install the vinyl plank flooring in the bathroom.
However, installing the vinyl plank flooring is a great choice to prevent your bathroom from water and scratch.
Because these are two major things that may damage the floor and require more money to invest.
That’s why I explained the pros and cons of vinyl plank flooring. But make sure to do this work carefully because there are few important pipes and other things in your bathroom.
If you cut any of them then you may be stuck in a problem.
FAQ: How To Install Vinyl Plank Flooring In Bathroom
Installing the vinyl plank flooring in the bathroom can be a little bit of difficult work. That’s why many people just like you are facing lots of problems.
That can be solved easily. That’s why I added some of their questions in this article and tried to give appropriate answers to them.
Which direction to lay vinyl plank flooring in the bathroom?
In my opinion and research, you should start the installation process of vinyl plank flooring in your bathroom from the left-hand corner.
But make sure to maintain a gap of about 1/4 inches from the baseboard.
How to install vinyl plank flooring under the bathtub?
Installing the vinyl plank flooring under the bathtub is not a great thing.
Because this may damage the other planks when you go inside.
Also, the vinyl planks flooring surface is quite smooth so maybe your bathtub also slips and if you are very excited. Then the chances may increase.
Which pattern should I follow for installing the vinyl plank flooring in my bathroom?
Keep in your mind that every pattern is great if the attachments are not in the straight line.
You can create any pattern you want or in your mind. Or you can follow the pattern which I explained above.