While reducing the electricity consumption inside the house this is necessary to make the complete house airtight.
So that cold and hot air can’t pass through from it. This will save up to 45% of your electricity bill and 90% cost for installing the insulation inside the house.
According to the report of the US Energy Information Administration in 2020, more than 236 billion kWh of electricity was consumed for only heating and cooling system in the residential sector.
Which is about 16% of total energy consumption for the whole residential sector in the US only.
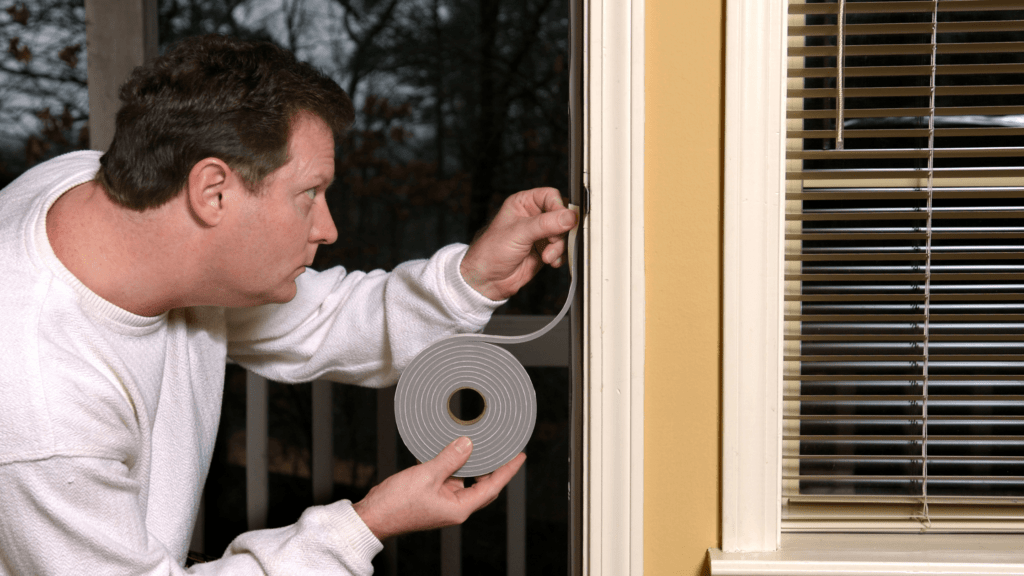
As you have seen how much energy you are wasting now it’s your turn to save it by using the weather stripping door seal strip.
This is a very small investment but it will help you to make your house airtight. Because most of the energy pass-through from the door and window gaps.
That’s why when you cover them nothing even too noise also can’t come inside your house.
All you need just selecting the best weatherstripping and then installing it properly so that no gap is left.
Do you how to install a weather stripping door seal strip? If no, then you need to read this article. Because in it I have explained the step-by-step process for installing the weather stripping.
Also, I have covered the types of weatherstripping materials that you can use and explained their benefits.
So make sure to read the complete article carefully if you want to understand it properly.
Let’s first start with the type of weatherstripping that will help you to select the best door seal.
Table of Contents
Types Of Weatherstripping
Mainly there are 6 types of weatherstripping available in the market that is perfect for your personal use. All of these are easy to find but the installation process may differ.
- Foam Self Adhesive: Usually this foam weatherstripping is a mixture of EPDM materials. That provides better flexibility and durability. So you don’t have to invest in it again and again. On the other hand foam weatherstripping usually comes in a tape design and has self-adhesive properties.
- Plain Weatherstripping: This is the most common weatherstripping that using most of the US houses. Usually, this is made with cotton or polyester. That will not harm your door surface but this will typically last between 2 or 3 years only. Also, while applying it on the surface you need additional glue.
- Plastic, Stainless Steel, and Aluminum: While going to the bottom of the door. You need to install the door sweep that is usually made from plastic, stainless steel, or aluminum. So that it can protect the bottom of your door and also block the dirt, dust to come inside.
- Metal Weatherstripping: Are you a classic lover and want a solid cure for this problem? Then you should go with the metal weatherstripping. Because this remains effective in the most intense climate change such as heavy wind, freezing temperature, and more.
- V-Strip: This is also called a tension strip that is usually self-adhesive and creates a better door seal. That will block the hot and cold air from pass-through it. Usually, this gasket installs at the top and the side of your door and window. Also, the installation process is not so hard to understand.
- Tabular Rubber Strip: Do you want an incredible air barrier in your house? Then you should go with the tabular rubber strip. That has a lifespan of about 5 years so you don’t need to invest again and again. But the installation process is very difficult if you didn’t install any weatherstripping in the past. Then you can’t do it.
Now you need to identify which weatherstripping is best for you and you can easily install it on your door.
Below I have described the foam and v strip weatherstripping. Because these 2 are the most simple and effective weatherstripping.
How To Install Weatherstripping Door Seal Strip
So while installation the weatherstripping on your door whether it is your front or garage door. There is a lot of work that you need to do for proper installation.
1. Collect The Materials and Mesure The Area
Previously, have you done improvement in your house by yourself? If yes, this is also going to as the same as you have done in the past.
But if you haven’t done any improvement then this is your first experience. That’s why you need to care about it and start with measuring the area on which you are going to installing the weatherstripping.
This will help your cut the exact size of the material and this way you can save the material. That will help you in the future also this will save your time and effort.
But make sure to note down all the measurements in the notebook. So that you can’t forget about it otherwise you need to repeat the process again and again.
So when you get the exact measurement of your door then you need to collect all the materials and tools.
That you are going to use in this process because if you are alone in the house. Then you need to leave your work and then getting all the materials one by one.
Usually, you need only a few tools and materials. So don’t get too confused.
2. Tighten The Door’s Hinges
Suppose if you install the weatherstripping and after some time your door starts losing and you can’t close it.
This usually happens when the strong wind and heavy rainfall dump to your door. This will damage especially the wooden door.
Because wood usually soaks the water and expend the size and then shrinks.
This will let the hinges lose that’s why you need to remove the complete weatherstrip. Then if you tried to reinstall the same one then it will not work effectively.
That’s why you need to invest in it again. So this is better to first have a waterproof door and then tighten all the hinges properly.
So that it will not going to lose in the heavy rainfall.
But make sure do not overtighten the door hinges otherwise your door may be stuck and you can’t close and open it.
Suppose if you are at home and suddenly your door is stuck and you are getting late for your important meeting.
Then what you will do is that’s why while tightening the hinges make sure to check your door properly.
3. Cut The Weatherstripping
Do you love something that you can save? Do you believe in reusing the material? Rubber and plastic these tow materials will last between 250 to 300 years.
Also, these materials have toxic that is harmful to your health. But literally, we don’t care about it. I know you can’t refuse to use them.
But you can reuse them that will help you to produce less.
That’s why while cutting the weatherstripping you can save up to 20% but usually, we waste them. Because if you are not those type of people then you should save it.
So that if in future you need it for your window or its time to replace the older weatherstripping. Then you can reuse it on your door again. This will also save some bucks.
All you need just follow the measurement that you have prepared while measuring the door size.
This will lead you to how much you need to cut the weatherstrip. As you know foam and v strip are made with a mixture of EPDM material that is very soft.
So you can use any ordinary scissors. Then start from the top and then go to the last but leave the bottom.
4. Start Adhere From The Top
Do you have a self-adhesive weatherstrip or not? Do you want to keep the weatherstrip in its place for a long time? Having the self-adhesive weatherstripping will help you to complete your work in no time.
Because of its back adhesive, all you need just peel it away and place it into the place. This will automatically stick from the surface.
But the main problem of this process is that this also can easily desquamate from the surface. So when any heaving wind and rainfall bump from your door.
You need to reinstall it because its stickiness may not work. That’s why most people after installing it in its exact place and then check if the door is perfectly working.
They will reinforce the installation by using heavy-duty staples or small tacking nails. I know this will also damage your door and when you try to remove it.
This will all become a mess but don’t worry you when you need to remove it you can use staple remover. And make sure while installing the strip always start from the top.
5. Install The Door Sweep
Have you soundproofed your garage door? Have you tried to insulate your room? While soundproofing or insulating the complete house or even room.
This is necessary to block each and every gap and crack inside the room. Because if any gap and crack are left then it will become the cause of sound and air transmission.
That’s why whether the noise is coming from the ceiling, wall, floor, or even underneath the door it should be blocked.
Otherwise, you can’t make your house peacefully and can’t save money. So after installing the weatherstripping on the top and sides of the door.
Now it turns to the bottom of your door.
For this work, you can use a door sweep that blocks all the gaps from the bottom of the door and surface.
Don’t worry you don’t need to cut any wooden or plastic parts. This is easily available on Amazon and if you want more information on how to install a door sweep properly.
That blocks the gap then you can visit this article. Because I have already explained about it.
6. Make Adjustment
Have you cut the weatherstrip too much? Is this weatherstrip hard to use? After installing the weatherstrip on your door.
If you have cut too much or left more. Then this is important to make an adjustment for making the insulation better and then save the electricity bill.
Because the more perfectly you install the weatherstrip the better insulation you get.
But suppose if your door is harder to close and open. Then do remove the weatherstrip? I think this is not the better idea because it will take a lot more time and money.
That’s why in my suggestion when you buy any weatherstripping just apply only one layer first. Then check your door can easily close or open.
So this will help you save your time and money because if you install the imperfect weatherstripping on your door.
Then try to force it while opening and closing. So you may face some issues with your door and it may damage more.
The hinges may not work at all and at the last, you may replace the door. So keep it in your mind.
So this is a step-by-step process for installing the weatherstripping door seal. So when you follow this process and use foam or v strip you will not be stuck in any problem.
But wait suppose if you install them if you someone asks about the major benefit of weatherstripping. Then what do you tell? That’s why you also need to read the benefits that I have explained below.
Benefits To Install Weatherstripping Garage Door Seal
Having the best weatherstripping is very important on your door. But this is also necessary that you should know the benefits of sealing your door.
- This will work as a strong barrier to prevent bugs, dirt, and dust to come inside the house.
- If you install the best weatherstripping properly then it will save up to 20% of your total electricity bill.
- Better weatherstripping will prevent the hot and cold air from escaping and coming inside the house.
- This will help you to prevent heavy rainfall to come inside your house.
Wrap Up On How To Weather Stripping Door Seal Strip
Whether you are living in Las Vegas or Alaska. If you want to save electricity consumption inside your house.
Then using the door weatherstripping is necessary. Because it will make the door better that works as a strong barrier against dirt, dust, bugs, climate change, noise, and more.
I know this looks too complicated to select the best weatherstripping then carefully install it on your door.
But this is not because I have provided all the types of weatherstripping. Also, I have explained that why and which one is best for you.
Suppose you want to with an easy way that’s why you selected the foam self-adhesive weatherstripping.
That’s a great choice because after selecting all you need just applying it on the surface and that’s all.
But make sure to follow the above steps for proper results. These steps will lead you to the next step and at the end, your door becomes fully insulated.
But in my suggestion, you should also have a heavy-duty blanket to cover the door. This will completely make your door insulated from start to end.
FAQ: How To Install Weatherstripping Door Seal Strip
Installing the weatherstripping on your door is quite difficult that’s why many people just like you face lots of problems.
But I have added some of them and tried my best to give appropriate answers. I know you will also find yours but if not then let me know in the comment section.
How much does it cost to install the door weatherstripping?
Installing the weatherstripping does not cost you more if you know how to install it.
Because if you know that then you can install it by yourself. Literally, I also didn’t have knowledge of how to do it but after researching on the internet. I found and this will cost me around $50.
Can I use weatherstripping on my garage door?
Yes, you can install the weatherstripping on your garage bottom or floor surface will help you to block the air transmission inside the garage.
This will also help you to fix the uneven floor but the installation and selection criteria are different from the door. Because you can use weatherstripping at the top and sides.
How much heat a weatherstrip can bear?
If you are living in the hottest place where the temperature is about 60 ℃.
Then it will remain flexible and easy to use.
But if it takes more than from it. Then it may not suffer but at this time you can use aluminum or stainless weatherstripping. As simple as that!.